“Do you really need a single-page application for that?”
Background - What is Turbolinks?
Update 2021-02-24
Since the writing of this blog post Hotwire has been released. Hotwire is the new collective name for the combination of Turbo (which used to be Turbolinks) and Stimulus. This new release means some of this blog post no longer is relevant. I will re-visit Turbo and Stimulus in a new blog post when I have the time. In the mean time you can have a look at the source code for a demo web-application I have built that uses the new versions of Turbo and Stimulus together with Giraffe/Saturn.
Turbolinks is a javascript library that gives your web application the look and feel of a single-page application, without really being one. The idea is that it intercepts any navigation and instead of reloading the page at that point, it fetches the page in the background and just switches the whole html <body> from response with the current body. A little simplified of course.
From the Turbolinks documentation:
Turbolinks® makes navigating your web application faster. Get the performance benefits of a single-page application without the added complexity of a client-side JavaScript framework. Use HTML to render your views on the server side and link to pages as usual. When you follow a link, Turbolinks automatically fetches the page, swaps in its <body>, and merges its <head>, all without incurring the cost of a full page load.
Turbolinks can be a good compromise when only a little interactivity is needed on the frontend, and you don’t want to setup a full single page application. It gives the user the feel a single-page application, but most of the business logic can be kept server-side.
I was previously using Elmish for this application, and so far I prefer this “simpler” solution I ended up with when using Turbolinks. But I should say that this is a quite simple application. If there is a lot of stuff going on the client-side I wouldn’t hesitate to use Elmish. Or maybe a hybrid approach with Turbolinks for most of the application and the Feliz.UseElmish React hook for any complicated components.
Turbolinks is originally a Ruby on Rails feature, but it really is just a javascript library that you load on your client, so you can use it with any webstack that uses javascript on the frontend1. In this example I am using the F# SAFE webstack with Saturn/Giraffe, if you for some reason prefer to work with something else, maybe C# and ASP.NET Core MVC it is still possible to benefit from using Turbolinks, of course.
The demo application
The demo application is a simplified version of an application I am using to keep track of how many eggs my chickens are laying. It is a very simple application where you can select a date and see what chickens that have laid an egg that day. You can also add/remove eggs; click on a chicken to add an egg, click on an egg to remove it. At the bottom we display some totals. Simple as that.
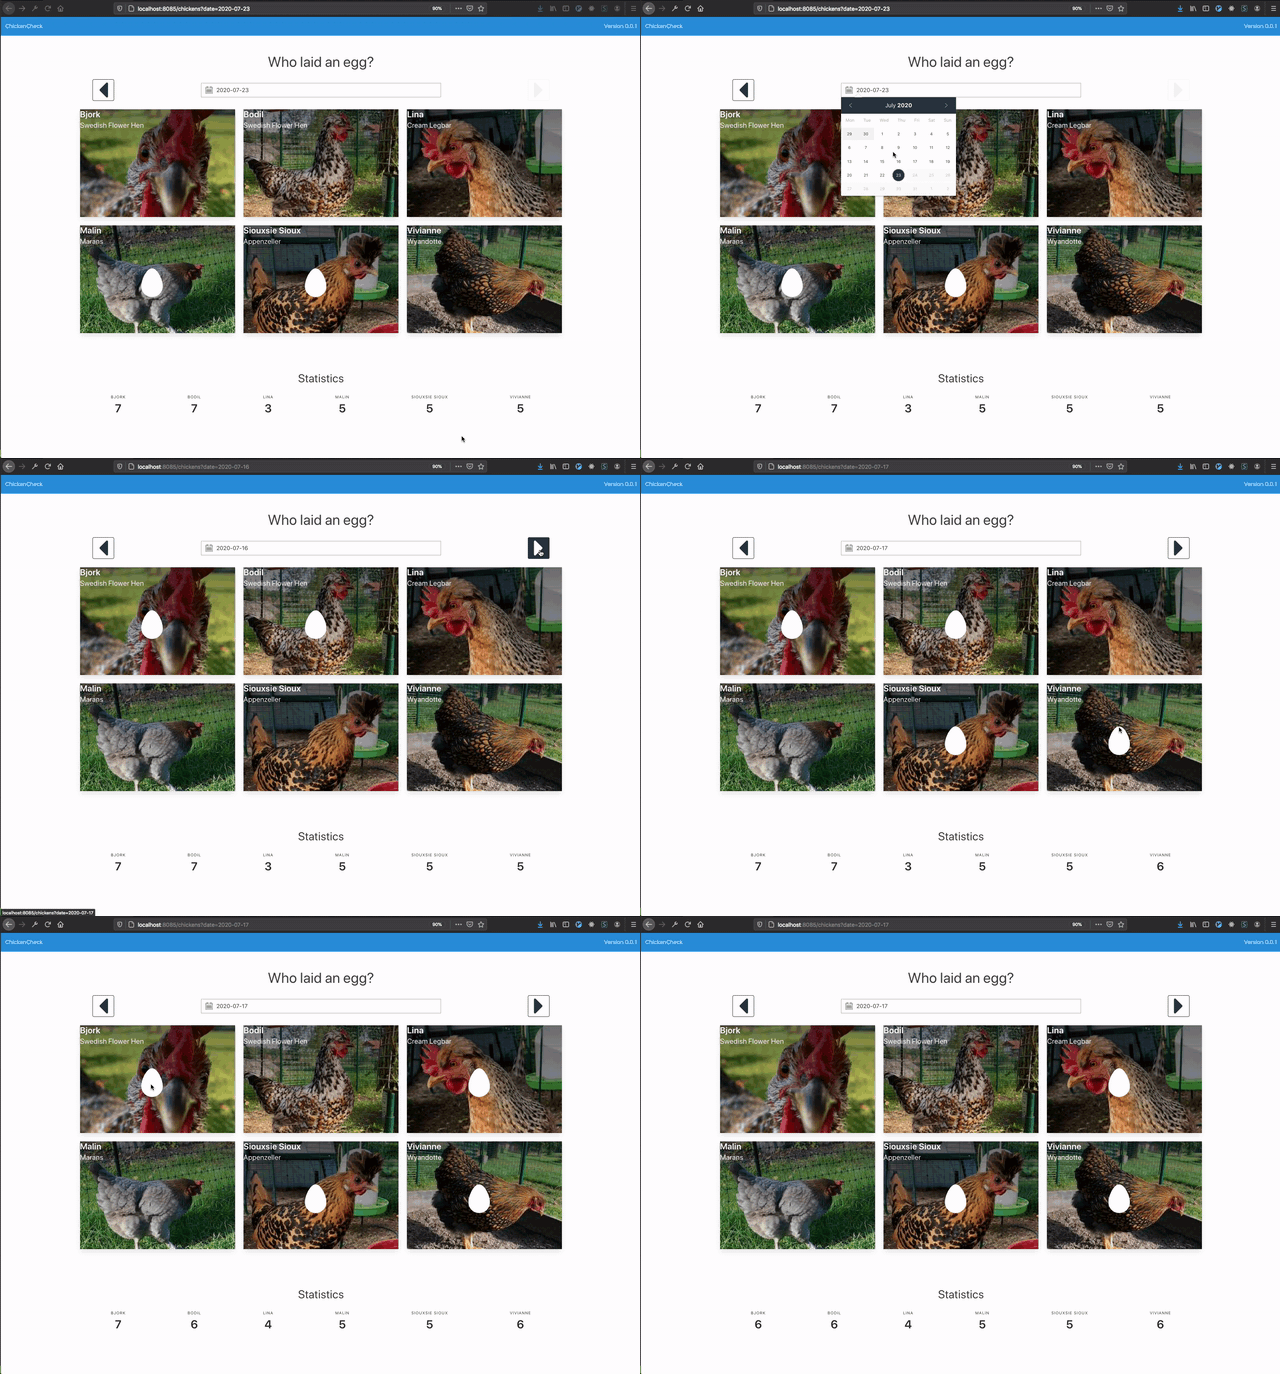
The complete demo application is available on github.
Our goals
So the goals we are reaching for with our Turbolinks enabled application is to:
- Render all html on the server.
- Navigate different dates: use Turbolinks to out-of-the-box handle page navigation.
- Edit data (add/remove eggs): use add some client side interactivity with javascript (or fable, rather).
- Deal with redirects
Step 1. Render all html on the server
I started out with an existing elmish application, so I was previously rendering the views with Fable, using Feliz and Feliz.Bulma. The client was then using Fable.Remoting to load and save data from the backend. The interface for the Fable.Remoting api was initially:
type IChickenApi =
        { GetAllChickens: NotFutureDate -> Async<Chicken list>
          GetEggCount: NotFutureDate * ChickenId list -> Async<Map<ChickenId, EggCount>>
          AddEgg: ChickenId * NotFutureDate -> Async<unit>
          RemoveEgg: ChickenId * NotFutureDate -> Async<unit> }
For completeness, here are the types it’s using
type ChickenId = ChickenId of Guid
type EggCount = EggCount of int
type Chicken =
    { Id: ChickenId
      Name: string
      ImageUrl: ImageUrl option
      Breed: string
      TotalCount: EggCount }
type NotFutureDate =
    { Year: int
      Month: int
      Day: int }
In our Turbolinks application the html will be rendered on the server instead, so i need to move my views to the backend. The backend I am using (Saturn/Giraffe) has a view engine that i could use, but there is even a view engine available for Feliz and Feliz.Bulma. So that made my work really easy, I could just copy my views from the client to the server, and remove anything related to event listeners, onchange, onselect, etc.
This means I will no longer be needing the Get... functions in the IChickenApi. That data will now be returned as a single html view from the backend. The browser client no longer needs to be dealing with updating react views with the chicken and eggcount data returned from the api. It just needs to display the html. Simple. We are left with some edit functions that we will be using in a later step:
type IChickenApi =
        { AddEgg: ChickenId * NotFutureDate -> Async<unit>
          RemoveEgg: ChickenId * NotFutureDate -> Async<unit> }
And I have made the following addition in my server setup:
// Server.fs

let defaultRoute() = sprintf "/chickens?date=%s" (NotFutureDate.today().ToString())
let browser = router {
    get "/" (redirectTo false (defaultRoute()))
    get "/chickens" chickensView
}
where chickensView renders the html.
We can now navigate the application as a normal server application and use the arrow buttons to change date. We cannot use the datepicker yet though, or add/remove eggs, since that requires some javascript on the client side. We will fix that in later steps.
Step 2. Navigate dates using Turbolinks
To enable Turbolinks you could just add it in a script tag in your html head:
<script src="https://cdnjs.cloudflare.com/ajax/libs/turbolinks/5.1.1/turbolinks.js"></script>
but since I will be adding some javascript of my own and will be creating my own javascript bundle, I will install Turbolinks with npm and require it instead:
npm install --save turbolinks
// Turbolinks.fs
module Client.Turbolinks

open Fable.Core.JsInterop

type private ITurbolinksLib =
    abstract start : unit -> unit
    abstract clearCache : unit -> unit
    abstract visit : string -> unit

let private turbolinks : ITurbolinksLib = importDefault "turbolinks"

let start() = turbolinks.start()
let visit url = turbolinks.visit url
let reset() =
    turbolinks.clearCache()
    turbolinks.visit ""
then, in my client entry-point I add
// App.fs
Turbolinks.start()
If I run the app now, and try to navigate using the navigation arrows, there are no longer any page reloads in the browser. Scripts and css are only loaded on the first page load. Turbolinks is doing it’s magic and intercepting navigation events and loading the data in the background. It also caches any visited pages, and will display the cached version while loading new data from the server.
Step 2b. Dealing with “permanent” elements
For this example i have added a navbar to the application, it displays the version of the application. On a narrow screen the link will be replaced with a burger menu button which the user can choose to expand. Except, there is no longer any javascript that expands that menu since I removed everything from the Elmish application. Let’s add that functionality back again2:
First we need to setup webpack to bundle our client scripts. I am using the webpack.config.js generated by the safe-template as starting point. Since we no longer will be running the client as a single page application I remove all the sections related to the webpack-dev-server. Also, we won’t be serving an index.html directly, that is going to be rendered by our server, so I remove the index.html file and the HtmlWebpackPlugin. This is my resulting webpack.config.js3.
We need to add an event listener for the navbar burger button that toggles is-active class on the corresponding navbar elements.
First some functions to toggle the classes:
open Browser

let toggleClass className (e: Element) =
    let newClasses =
        if e.className.Contains(className) then
            e.className.Replace(className, "")
        else
            e.className + " " + className
    e.className <- newClasses

let toggleNavbarMenu () =
    document.getElementById("chickencheck-navbar-burger")
    |> Option.ofObj
    |> Option.iter (toggleClass "is-active")
    document.getElementById("chickencheck-navbar-menu")
    |> Option.ofObj
    |> Option.iter (toggleClass "is-active")
then, using event delegation we add the following event listener:
// App.fs

document.onclick <-
    fun ev ->
        let target = ev.target :?> Element
        if target.closest(".navbar-burger").IsSome then
            Navbar.toggleNavbarMenu()
But we will be adding some more onclick events later on, let’s refactor this a bit. The Active Pattern feature of F# will come in handy here, let’s define a pattern for our navbar button target:
    let (|NavbarBurger|_|) (target: Element) =
        if target.closest(".navbar-burger").IsSome then
            Some NavbarBurger
        else
            None
and then use it when we add the event listener:
// App.fs
document.onclick <-
    fun ev ->
        match ev.target :?> Element with
        | NavbarBurger -> Navbar.toggleNavbarMenu()
        | _ -> ()
if we try it out now, it almost works as expected:
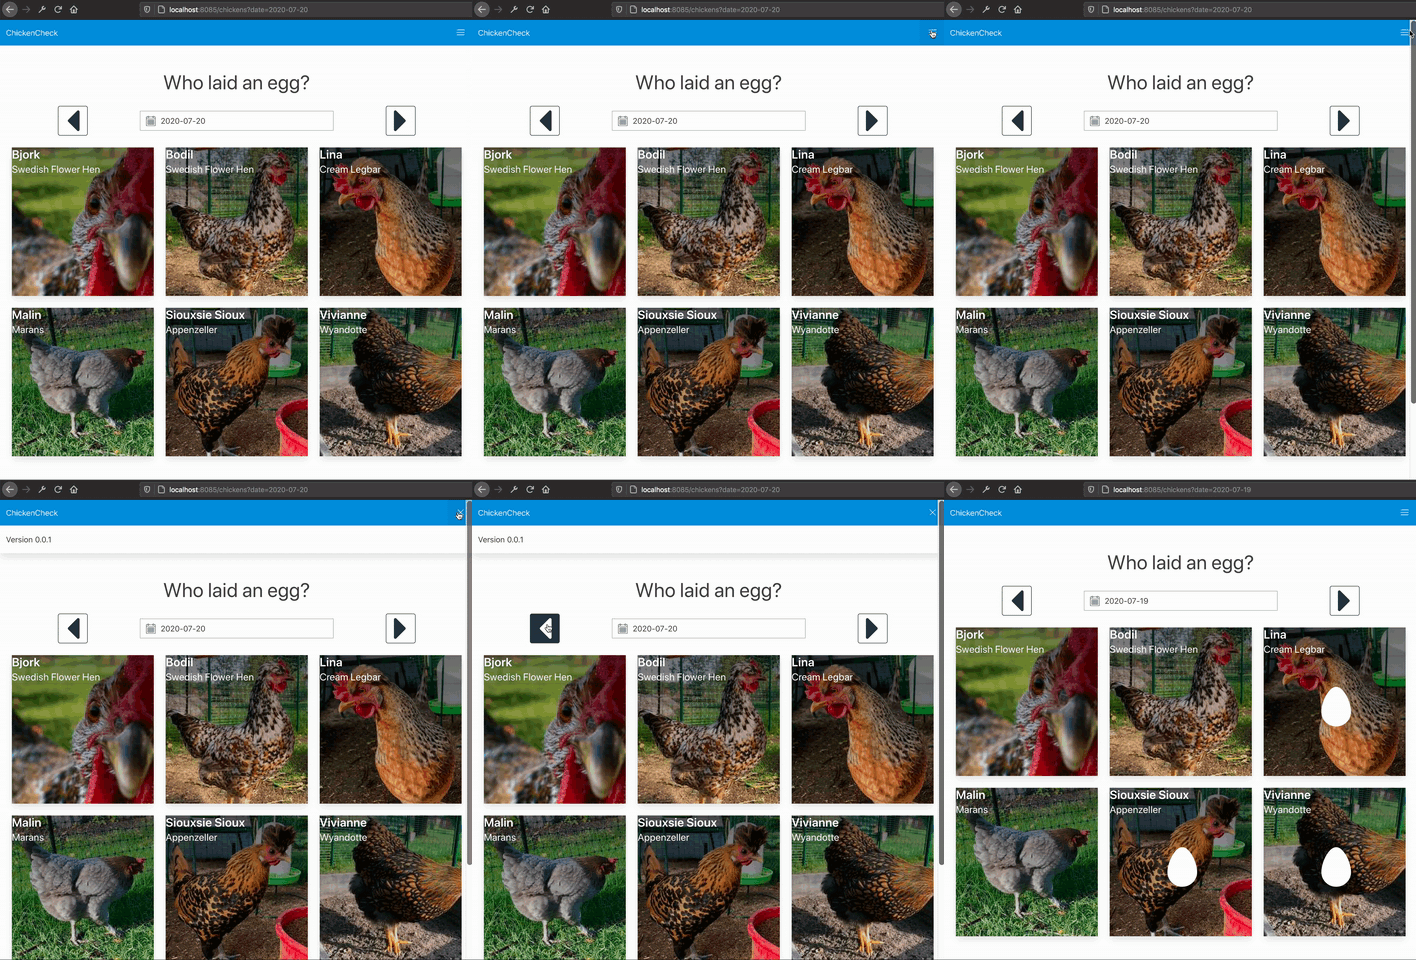
When navigating to another date, we expect that menu stays expanded, but it’s doesn’t. When Turbolinks replaces the html body with the new one it fetched from the server it will overwrite any changes we have done with javascript. But there is a solution for this, we need to mark our navbar with the data-turbolinks-permanent attribute4:
    Bulma.navbar [
        prop.id "chickencheck-navbar"
        prop.custom ("data-turbolinks-permanent", "")
        // ...
With this attribute in place Turbolinks will save that element and transfer it to the new page, preserving the data and event listeners. Now the navbar menu will stay expanded even when navigating:
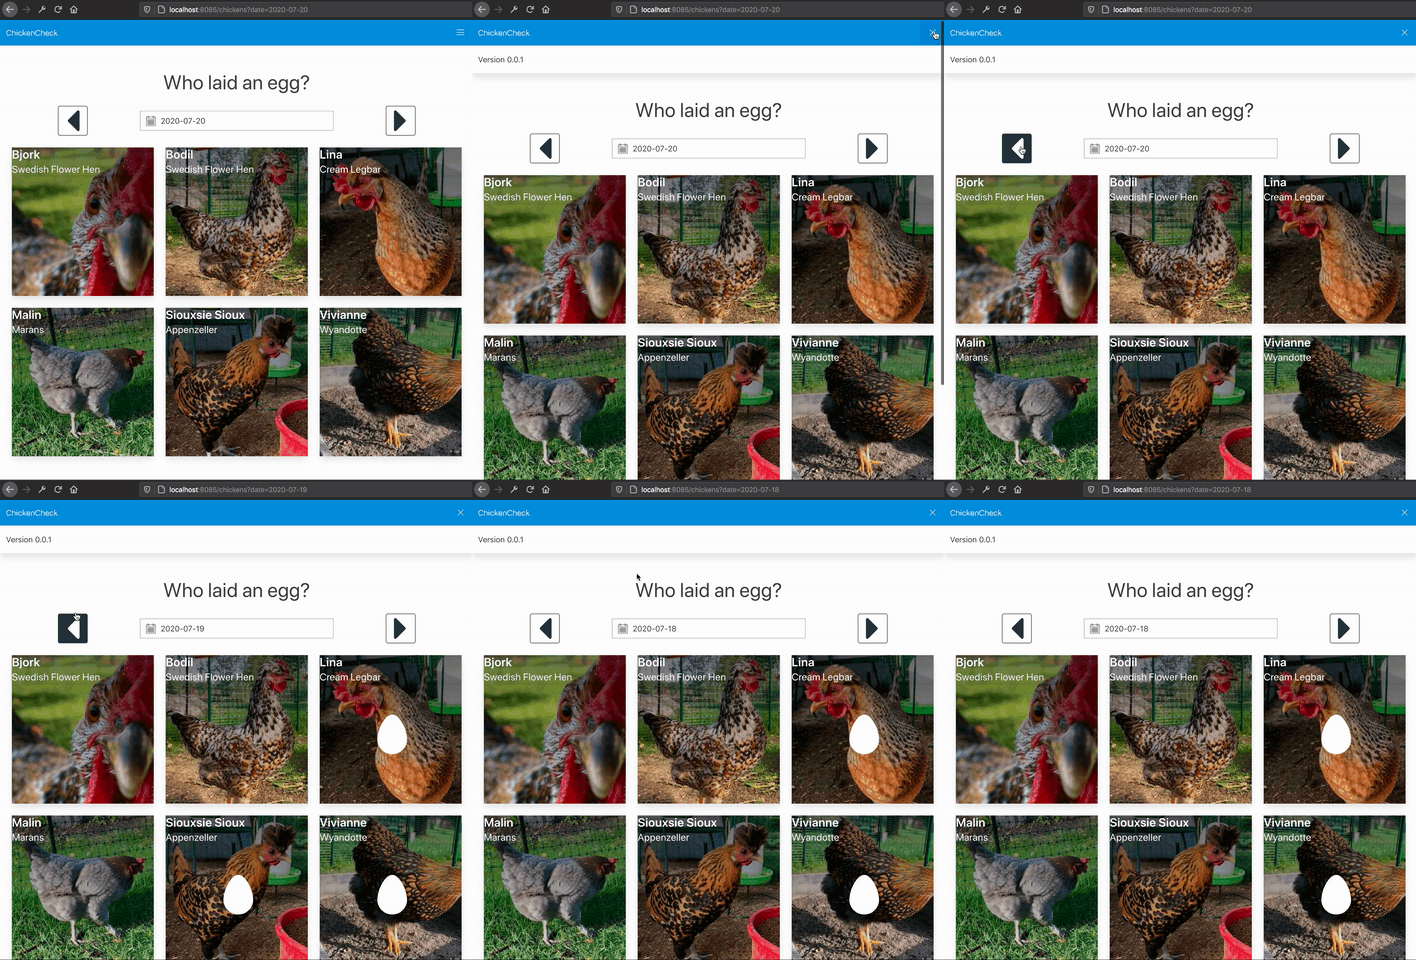
Step 2c. Using the date input to navigate dates
Now let’s hook up the datepicker to actually do some navigation. For cross-platform styling of the date input I am using Bulma.Calendar. The Bulma-calendar datepicker needs to be attached (or refreshed) every time we load the page, so we need to add some initialization code when our page is loaded. But we cannot do this in window.onload since with Turbolinks active this event is only triggered once on first page load. Instead we need to do our initialization in the Turbolinks custom event turbolinks:load:
// App.fs

document.addEventListener("turbolinks:load", fun _ ->
    Datepicker.init ())

// Datepicker.fs
let init() =

    let datepicker = getDatePickerElement()
    datepicker.OnSelect(fun _ ->
        let date =
            datepicker.date.start
            |> Option.ofNullable
            |> Option.map NotFutureDate.create
            |> Option.defaultValue (NotFutureDate.today())
        if date <> currentDate then
            let dateQueryStr = sprintf "?date=%s" (date.ToString())
            Turbolinks.visit(window.location.pathname + dateQueryStr))
    )
I have omitted and simplified a little bit here5, but the gist is that we attach an event listener and if the date has changed we use Turbolinks to programmatically navigate to the page for the new date using Turbolinks.visit(url). visit works just like if we navigated by clicking a hyperlink, if a preview is available it is displayed first while the new page is loaded in the background.
Now we can use the datepicker to navigate:
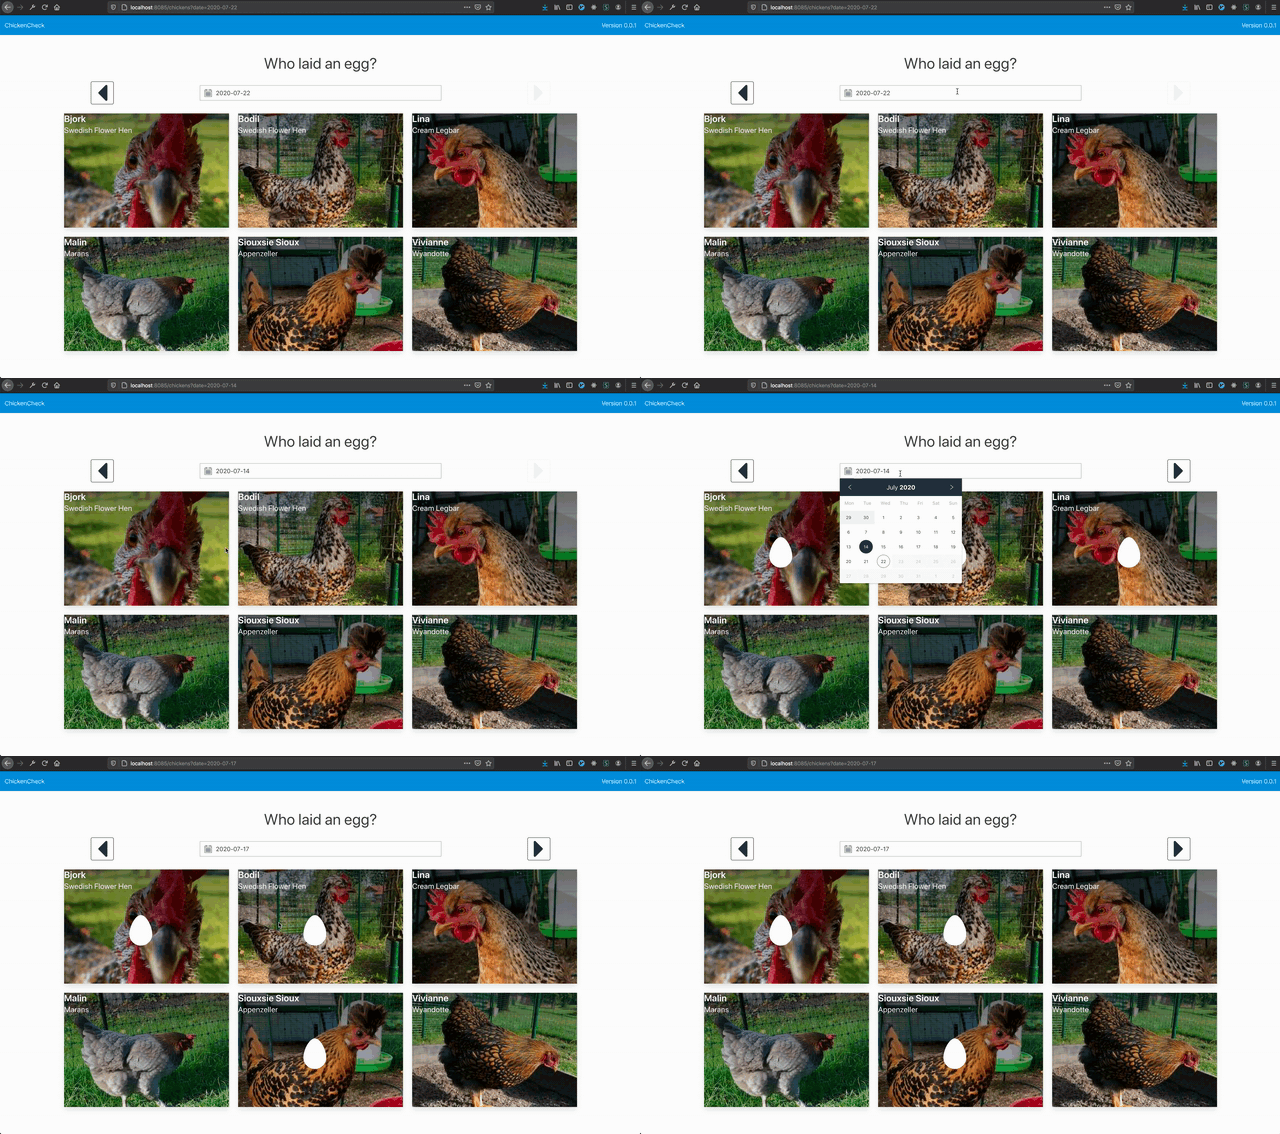
Step 3. Edit data
Now let’s implement the last missing feature, adding and removing eggs for chickens.
With Turbolinks, when we editing data we don’t want to submit a form like in a normal web application. The suggested pattern from the Turbolinks documentation is to submit the form data with XHR and then return javascript from the server that performs a Turbolinks.visit(url) and optionally Turbolinks.clearCache() if the cache needs to be cleared.
I.e. we need to send a request to the server, use visit to redirect to the page we want to end up at, and also clear the Turbolinks cache. I think Fable.Remoting is really convenient for client-server communication with Fable, so I will use that. Also I already had implemented a Fable.Remoting api in my Elmish version of this application.
The type signatures for the addEgg/removeEgg functions looks like this:
type IChickenApi =
        { AddEgg: ChickenId * NotFutureDate -> Async<unit>
          RemoveEgg: ChickenId * NotFutureDate -> Async<unit> }
When we are adding/removing eggs we need to know the id of the chicken we are performing the operation on. When rendering the html in the server this id is set as a data attribute on the chicken card and egg icon respectively. For convenience I have added a type extension to Element for easy access. In the same way currentDate is read from another data attribute:
module DataAttributes =
    let parseChickenId (element: Element) =
        element?dataset?chickenId
        |> ChickenId.parse

    let parseCurrentDate() =
        document.querySelector(sprintf "[%s]" DataAttributes.CurrentDate)?dataset?currentDate
        |> NotFutureDate.parse

type Element with
    member this.ChickenId = DataAttributes.parseChickenId(this)
Add new active patterns, that also returns the parsed ChickenId:
let private tryGetEggIconElement (target: Element) =
    target.closest(".egg-icon")

let (|EggIcon|_|) (target: Element) =
    target
    |> tryGetEggIconElement
    |> Option.map (fun e -> EggIcon e.ChickenId)

let private tryGetChickenCardElement (target: Element) =
    if (tryGetEggIconElement target |> Option.isSome) then None
    else
        target.closest(".chicken-card")

let (|ChickenCard|_|) (target: Element) =
    target
    |> tryGetChickenCardElement
    |> Option.map (fun e -> ChickenCard e.ChickenId)
Hook them up in App.fs:
// App.fs
let api : IChickensApi =
    Remoting.createApi()
    |> Remoting.withRouteBuilder Route.builder
    |> Remoting.buildProxy<IChickensApi>

let currentDate() = DataAttributes.parseCurrentDate()

document.onclick <-
    fun ev ->
        match ev.target :?> element with
        | NavbarBurger -> Navbar.ToggleNavbarMenu()
        | ChickenCard chickenId -> Chickens.addEgg api chickenId (currentDate())
        | EggIcon chickenId -> Chickens.removeEgg api chickenId (currentDate())
        | _ -> ()
And the implementation of addEgg/removeEgg:
let addEgg (api: IChickensApi) (scrollPosition: ScrollPositionService) =
    fun chickenId date ->
        async {
            try
                window.event.stopPropagation()
                showEggLoader chickenId
                do! api.AddEgg(chickenId, date)
                Turbolinks.reset()
            with exn ->
                eprintf "addEgg failed: %s" exn.Message
        }
        |> Async.StartImmediate

let removeEgg (api: IChickensApi) (scrollPosition: ScrollPositionService) =
    fun chickenId date ->
        async {
            try
                window.event.stopPropagation()
                hideEggIcon chickenId
                showEggLoader chickenId
                do! api.RemoveEgg(chickenId, date)
                Turbolinks.reset()
            with exn ->
                eprintf "removeEgg failed: %s" exn.Message
        }
        |> Async.StartImmediate
hideEggIcon / showEggLoader are helper functions to show a loading spinner while waiting for the response from the server:
let private hideEggIcon (id: ChickenId) =
    let selector = sprintf ".egg-icon[%s]" (DataAttributes.chickenIdStr id)
    document.querySelector selector
    |> Option.ofObj
    |> Option.iter (HtmlHelper.toggleClass "is-hidden")

let private showEggLoader (id: ChickenId) =
    let selector = sprintf ".egg-icon-loader[%s]" (DataAttributes.chickenIdStr id)
    document.querySelector selector
    |> Option.ofObj
    |> Option.iter (HtmlHelper.toggleClass "is-hidden")
Step 3b. Saving scroll position
If we try out the application now, we can see that adding and removing adds works… but if we scroll the page it jumps back to the top every time we make an edit:
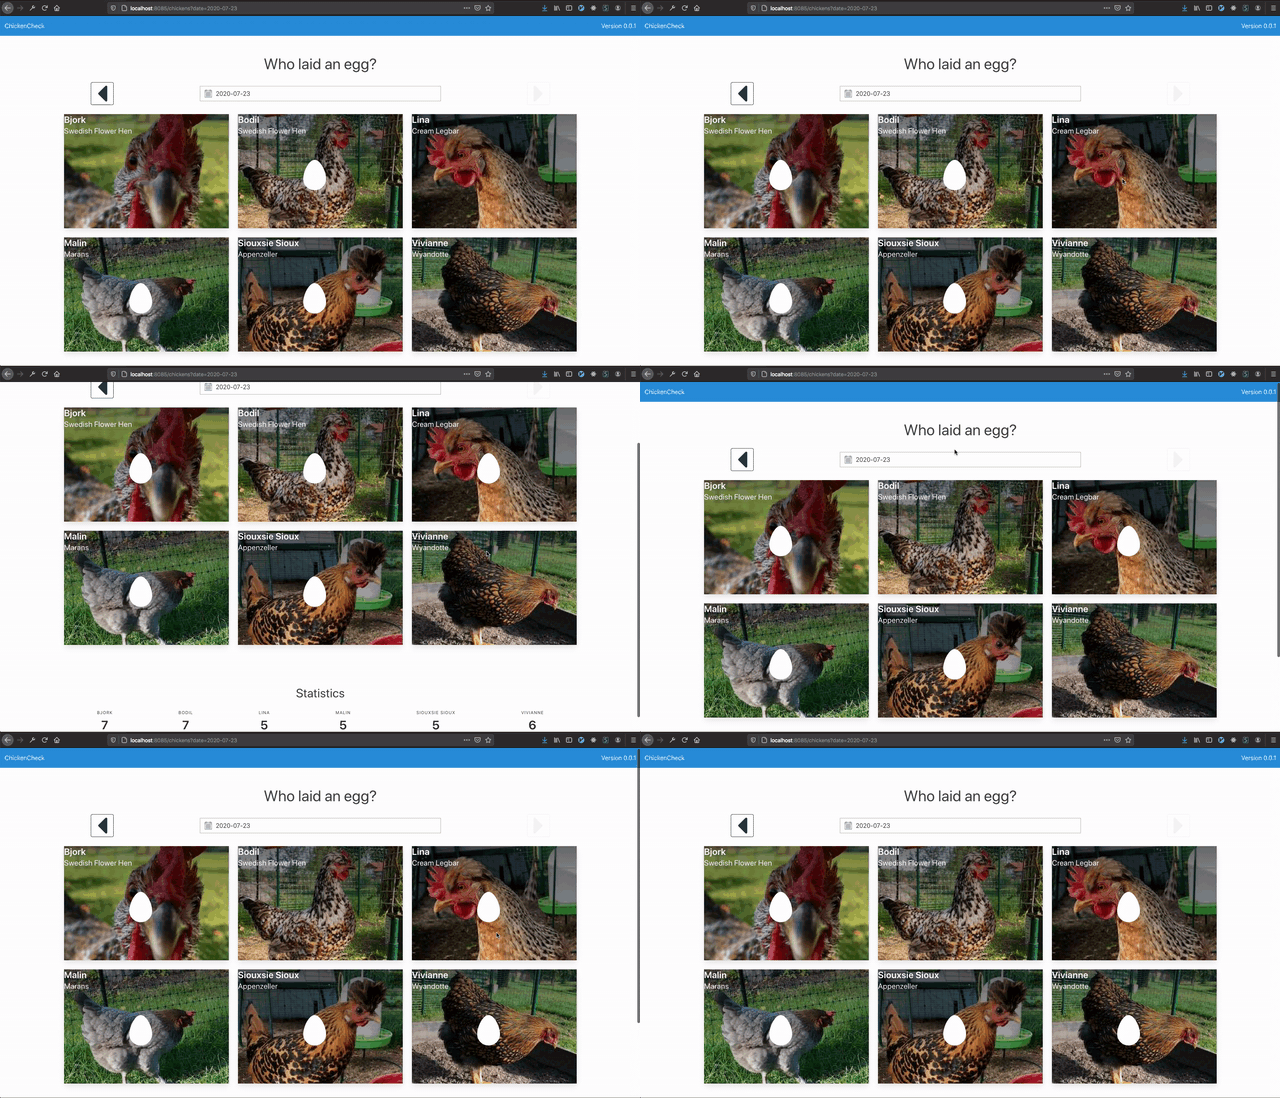
This is caused by the call to Turbolinks.visit(). To fix this we can add a helper to save and recall the scroll position:
// ScrollPositionService.fs
open Browser

type ScrollPositionService() =
    let mutable scrollPosition = None
    member this.Save() =
        scrollPosition <- Some {| X = window.scrollX; Y = window.scrollY |}
    member this.Recall() =
        scrollPosition
        |> Option.iter (fun p -> window.scrollTo(p.X, p.Y))
        scrollPosition <- None
And we hook into another custom Turbolinks event “turbolinks:before-cache” to save the scroll position, then recall it in “turbolinks:load”:
// App.fs

document.addEventListener("turbolinks:before-cache", fun _ ->
    CompositionRoot.scrollPositionService.Save())

document.addEventListener("turbolinks:load", fun _ ->
    CompositionRoot.scrollPositionService.Recall()
    Datepicker.init ())
)
And voilà, the page no longer jumps to the top when we add or remove eggs.
Step 4. Deal with redirects
One last thing.
If we click on the link “ChickenCheck” in the navbar we are taken back to the root of the home page. On the server this will redirect us to the chickens page for the current date /chickens/date?<currentDate>. If we try it we can see that the url in our browser stays at the root of the homepage. This is expected, from the documentation: “Turbolinks makes requests using XMLHttpRequest, which transparently follows redirects. There’s no way for Turbolinks to tell whether a request resulted in a redirect without additional cooperation from the server.”
To fix this we need to add a custom response header “Turbolinks-Location” to all requests initiated by Turbolinks (with request header “Turbolinks-Referrer”). Turbolinks will then replace the last entry in the browser history with this value. So in our server setup we add this code:
// Server.fs
let setTurbolinksLocationHeader : HttpHandler =
    let isTurbolink (ctx: HttpContext) =
        ctx.Request.Headers.ContainsKey "Turbolinks-Referrer"

    fun next ctx ->
        task {
            if isTurbolink ctx then
                ctx.SetHttpHeader "Turbolinks-Location" (ctx.Request.Path + ctx.Request.QueryString)
            return! next ctx
        }
And add this httphandler to our server pipeline. Since I am using Saturn I can do this by “plugging” it into my endpointPipeline:
let endpointPipe = pipeline {
    plug putSecureBrowserHeaders
    plug head
    plug setTurbolinksLocationHeader
}
And we’re done!
Conclusions
In this small application I feel that using Turbolinks greatly simplified my code. I could get rid of a lot of Elmish boiler-plate, Models and Messages. And I only needed to deal with rendering html in one place in the server where I had all information readily available. In the elmish application I had to deal with several kinds of updates to the views, e.g. The user changed date -> fetch new eggCount and update the view; The user added an egg -> update the eggCount for the correct chicken view + update the total count in the statistics section. Albeit we had to add some event listener setup, but with the Active Patterns I feel it turned out pretty clean.
With that said I think there absolutely are use cases, i.e. apps with a lot going on at the client side, where I would prefer to use Elmish, or Feliz.UseElmish.
-
If you want Turbolinks to handle redirects (i.e. if you expect a redirect on the server to also update the url in the browser) you need to add a middleware that sets a Turbolinks specific header so it knows what location it is supposed to be at. For Ruby on Rails there is a Turbolinks RubyGem available that already does this for you. We will deal with this in step 4. ↩
-
We could also implement this functionality with a query string parameter, e.g. ?expandMenu=true, and then render the menu expanded in the html returned from the server. But for the sake of this example, let’s do it with javascript. ↩
-
I have simplified the optimization section to only generate two chunks, to make it easier to include in this demo application. In a production setting you may want to split your vendor scripts into separate chunks, and use [contenthash] in the bundle names to be able to do cache busting. If you go that route you need to look at the generated webpack manifest and include your bundles in the correct order in your html head. But it’s out of scope of this blog post. ↩
-
The element also needs to have an id. ↩
-
We need to deal with some different cases when we need to attach the Bulma.Calendar javascript, depending on if we are navigating “by links” or by using the “back” and “forward” buttons of the browser. See the full solution for all details. ↩
